

Looking for detailed SDK documentation? Check out our SDK documentation for comprehensive guides on @flowglad/nextjs, @flowglad/react, and more.
1. Sign Up For Flowglad
Create a Flowglad account.2. Add Your API Key
Add your Flowglad API key to your environment.env
Installation & Setup
From here you can install and setup Flowglad in one of two ways.Integrate by Prompt (recommended)
Integrate by Prompt (recommended)
Flowglad has an MCP server! It can give your AI coding agents more context with the Flowglad docs. You can add it to your AI coding tool of choice by following the MCP server documentation.
1. Install The Flowglad Package
2. Codebase Overview
Flowglad can create a custom integration prompt for each pricing model in your organization.If you haven’t already, you’ll need to complete a codebase overview to give Flowglad context about your codebase. You’ll be asked to complete this overview when creating a new organization or you can do it later in settings.Simply copy the overview prompt into your AI coding tool of choice and paste the output into the provided text area in Flowglad.3. One Shot Integration
To access a pricing model’s custom integration prompt, go to your pricing model, click “More Options”, click “Integrate”, and you’ll see the prompt (it may take some time to generate).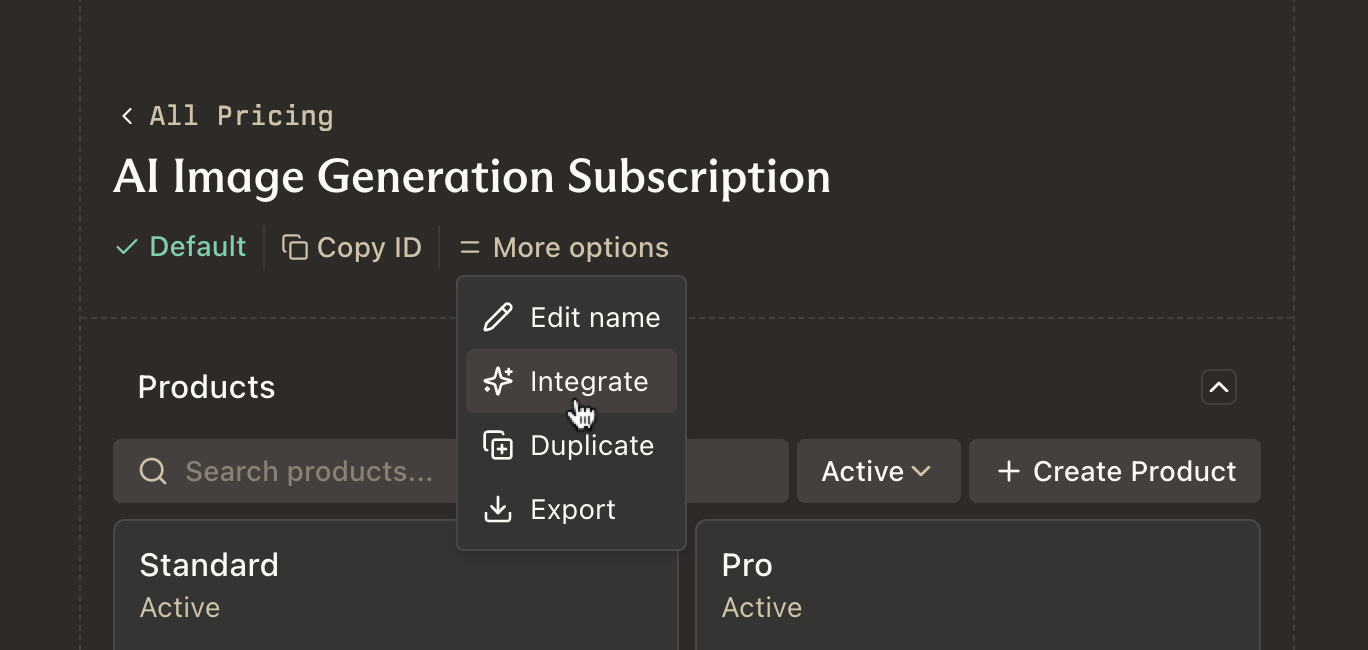
Continue Manually
Continue Manually
1. Install Flowglad
2. Server Setup
First, set up a Flowglad server factory function. Do this in a file that can be imported wherever you need to access billing data, or make calls to Flowglad.Important:
B2B apps: Pass
customerExternalId is the ID from your app’s database (e.g., user.id or organization.id), not Flowglad’s customer ID.B2C apps: Pass user.id as customerExternalIdB2B apps: Pass
organization.id or team.id as customerExternalId/api/flowglad/[...path]. Your app will use this to send and receive data from Flowglad.The
getCustomerExternalId function extracts the customer ID from your app’s database (via your authentication system). Flowglad doesn’t care how you authenticate—just return the ID from your system that represents the billing entity (user ID for B2C, organization ID for B2B). This is not Flowglad’s customer ID.Flowglad integrates seamlessly with your auth provider. Read more about auth options here.
You can mount Flowglad’s handler at a different route, but you’ll
need to specify it via the
baseURL prop in <FlowgladProvider /> in your React app. Flowglad will automatically append /api/flowglad to the baseURL when making requests.3. Set up React
Next, you need to set up the FlowgladProvider component.4. useBilling
Use the useBilling hook to get billing data on your customer’s frontend.